Timber + WooCommerce is our series of integrating WooCommerce with Timber Library.
Ch.1 – Shop and Single page
Ch.2 – Cart Dropdown
Ch.3 – Login Page (Coming Soon)
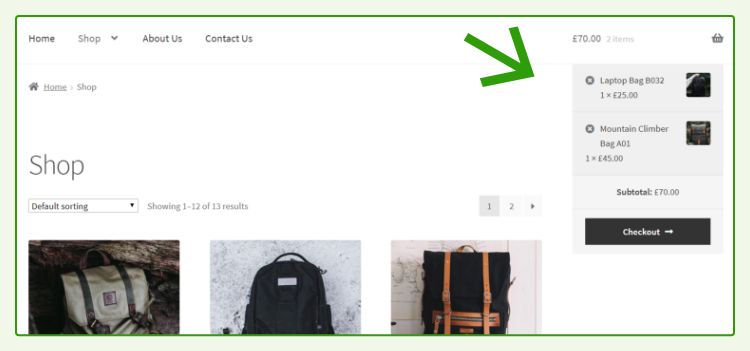
Most WooCommerce theme has that cart dropdown which shows all products you have selected. In this tutorial, we are going to create that with Timber.

Note: WooCommerce version used in this article is 3.9.0
Step 1: Preparing the Template
First, decide where you want to place it.
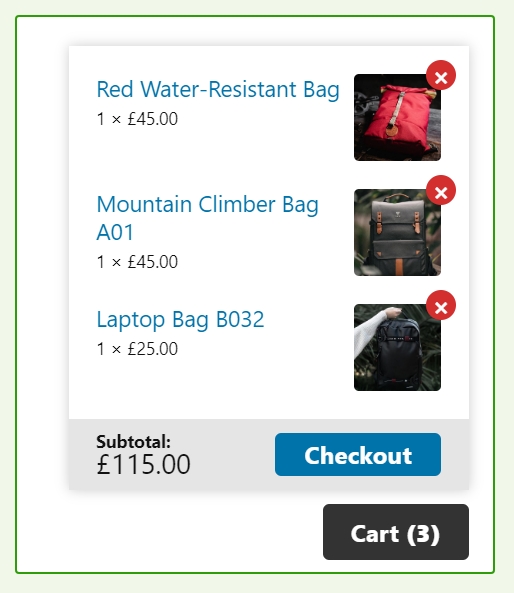
Ideally, it should be at the top, besides the navigation menu. But for simplicity’s sake, we are going to make it floating at the bottom-right corner like below:

Then create 2 template files: One contains just the button/trigger, and the other one contains the whole package:
{# The button template #}

<a id="cart-button"
  class="{{ woo.cart.is_empty ? 'button button--passive' : 'button' }}"
  href="{{ fn('wc_get_cart_url') }}">

  <span>Cart</span>
  <b>({{ woo.cart.get_cart_contents_count }})</b>
</a>
{# The whole template, including the button #}

<aside class="cart-menu">
  {% include 'shop/_cart-button.twig' %}

  <div class="cart-dialog">
    {# The product list is actually an existing widget #}
    {{ fn('the_widget', 'WC_Widget_Cart' ) }}
  </div>
</aside>
Step 2: Echo It
Since I want to place it floating at the bottom-right corner, I chose to echo it at wp_footer:
add_action( 'wp_footer', function() {
  global $woocommerce;
  $context = [ 'woo' => $woocommerce ];

  Timber::render( 'shop/cart.twig', $context );
} );
If you want to put it besides the navigation menu, then you can include it in your Header template like below: (Don’t forget to add $woocommerce object named woo to context).
<header class="site-header">
  <nav class="site-nav"> ... </nav>

  {% include "shop/cart.twig" %}
</header>
Step 3: Enable AJAX Update on Button
When you click “Add to Cart” in the product listing, it’s appended to your Cart Widget without refreshing the page.
This is done by using a JavaScript technique called AJAX.
But the button that shows the product count is not updated. We need to fix this by using this hook:
// Run everytime the cart widget is updated
add_filter( 'woocommerce_add_to_cart_fragments', function( $fragments ) {
  ob_start();
  global $woocommerce;
  $context = [ 'woo' => $woocommerce ];

  Timber::render( 'shop/_cart-button.twig', $context );

  // Must be the same button ID with the one we use in template
  $fragments['#cart-button'] = ob_get_clean();
  return $fragments;
} );
Even though that hook looks weird, that method is used by the official Storefront theme. So don’t worry, it’s the right way.
Step 4: Done?
There is actually one last step: Writing the CSS and JS to toggle the dropdown. But I won’t dive into that because it’s up to your preferences.
If you like to see my styling, I put it in CodePen.
Conclusion
Figuring out Cart Dropdown in Timber took me the longest back then. There are no resources available online, so I need to experiment on my own.
In my first iteration, I was using the global $woocommerce object to extract Cart data. It does work, but you need to write your own AJAX update.
I initially planned to discuss Cart Dropdown and User Sign-in for Part 2. But I feel the first topic is already long enough. So it will be reserved for Part 3 🙂
Let me know if you have any question regarding Cart dropdown with Timber 🙂


Thank you for updating the part 2! I will have a good read of it! 😀
Hey man, im new to timber, ive built a website using twig with craft cms, yet to use it for wordpress, loving this series, when is the login page oming out?
Hi Steven, sorry I don't think I'm going to add more Timber content as I have stopped using Timber for the past 1.5 year.
But I recommend to just use the default
pagetemplate for the Login and use CSS to stylize it. I realized that using Timber too much on WooCommerce will only create incompatibility with some plugins that your client might need.Thank you