What is Cache? Cache is a temporary snapshot of your site. Instead of loading from database everytime someone visits, it serves that instead.
W3 Total Cache is my favorite caching plugins in WordPress. It is aggressive, effective, and customizable.
Most reviewers say that the Setting page looks intimidating, which is true. But you don’t have to understand what each setting does because there is 1 configuration that should fit for almost all WordPress sites. We will take a look below.
NOTE: This guide assumes you are on default setting. If you have changed something, go to Performance > General, then scroll to the very bottom and there is “Restore Default Settings” button.
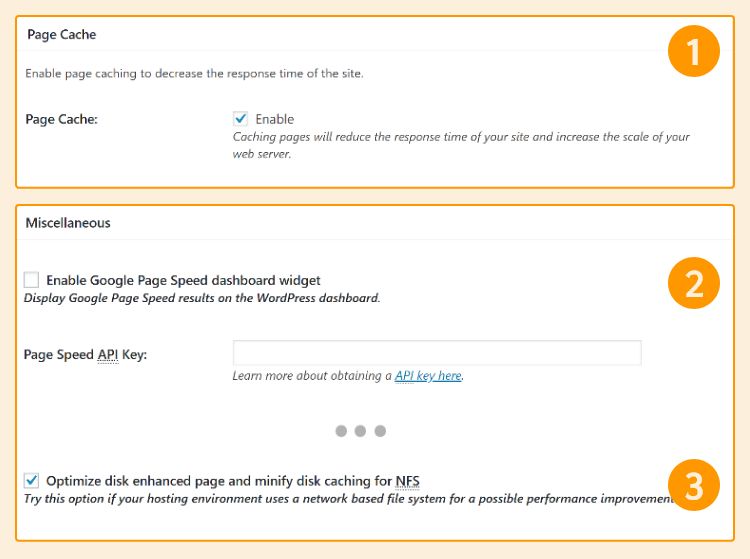
Performance > General Settings
- Page Cache – tick “Enable”
- Miscellaneous – untick “Enable Google Page Speed dashboard widget”
- Miscellaneous – tick “Optimize disk enhanced page”

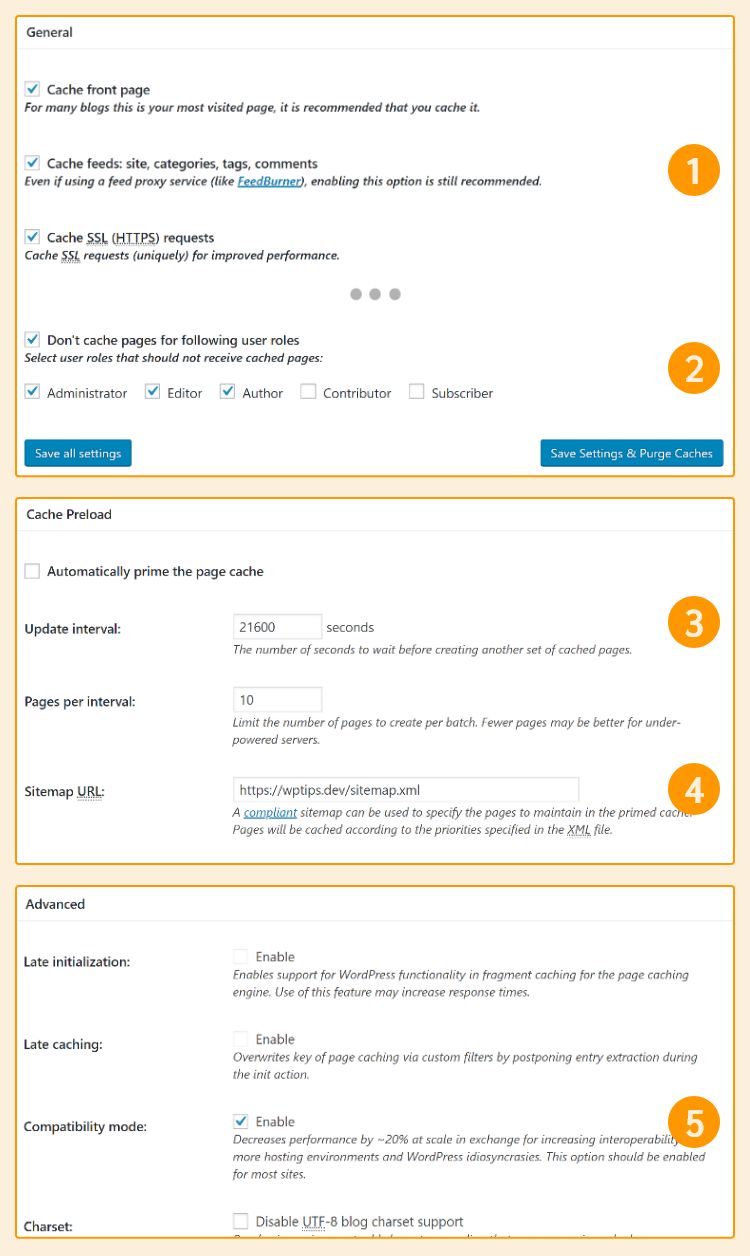
Performance > Page Cache
- General – tick “Cache feeds: site, categories, tags, comments”.
- General – tick “Don’t cache pages for following user roles” then tick “Admin”, “Editor”, and “Author”. If you use WooCommerce, tick “Shop Manager” too.
- Cache Preload – (optional) change Update Interval to fit your needs. If your site rarely change, set to 86400 seconds (24 hour).
- Cache Preload – put in Sitemap URL, if you use Jetpack or SEO plugin, it should be in
https://yoursite.com/sitemap.xml. Try opening the URL to make sure it exists. - Advanced – tick “Compatibility mode”.

Performance > Browser Cache
- General – tick “Set expires header”.
- General – tick “Set cache control header”.
- General – tick “Set W3 Total Cache header”

That’s all, simple right? It still has tons of settings, but we can leave that by default.
Conclusion
W3 Total Cache is one of the top caching plugin. A lot of people are afraid of misconfiguration due to how complex it is. By following the steps above, you will see that you don’t need to touch most settings to use it optimally.
Are you using W3 Total Cache? Feel free to share your experience or extra tips 🙂


