

WAMP is a lightweight PHP Server for Windows. It’s not designed specially for WordPress so you need to do extra steps to make it work.
1. Installation
Always install it on the default directory (C:\wamp) to avoid weird behavior in the future.
2. Set Database Password
By default the database has no password, but you need to have one for WordPress setup. Here’s how to add password:
- Go to
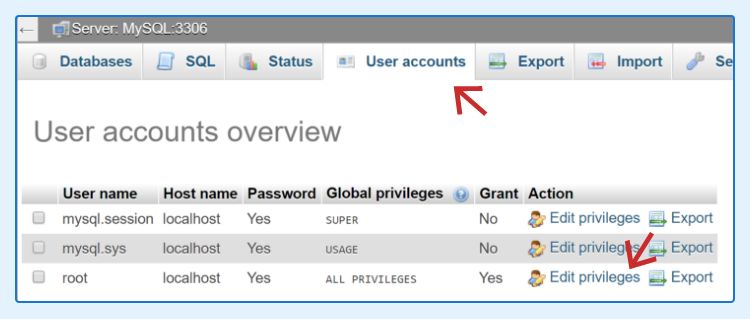
localhost/phpmyadminin your browser. Login using the usernamerootand empty password. - Choose “User Accounts” tab then click “Edit Privileges” on
rootaccount (See picture below). - Inside, you will find “Change Password” box. Fill in and save. Done!
3. Create an Empty Database
Still in PHPMyAdmin, click “Databases” tab then create a new database like shown in the picture below:

4. Download WordPress Core Files
Download the files and extract it to your empty project directory.
If you have WP-CLI installed, simply type in the command wp core download. We will cover this topic soon.
5. Create Virtual Host
Virtual Host is basically a fake domain name like my-site.test to mask our local project. Always use either .local or .test because those two are reserved for local testing and won’t be sold.
Here’s how you create a Virtual Host in WAMP:
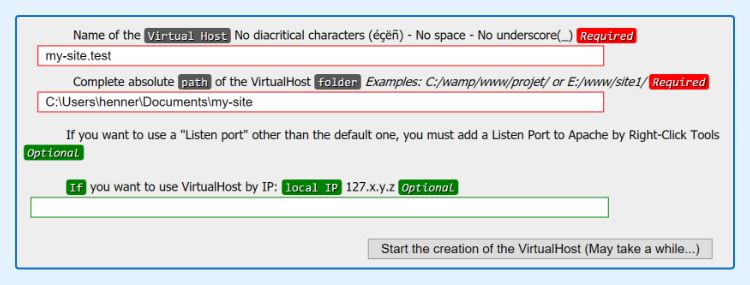
- Go to
http://localhost/add_vhost.phpin your browser. - Fill in the 1st field with your fake domain name and the 2nd field with your project’s directory. Then click “Start the creation…”.
- You need to restart DNS for the changes to apply. Right-click the WAMP tray icon > Tools > Restart DNS
- Done! Wait until the WAMP icon turns green and try going to the domain in your browser. You will be prompted with the WordPress installation page.
That’s it! Now you have a working WordPress site running in your Windows PC. You can start adding theme, plugins, etc.
Conclusion
As a developer, you always have to develop your site locally first. It loads faster and if there’s a fatal error, it’s easier to fix.
By following the guide above, you will have a PHP server running in your Windows using WAMP, which is the fastest and most lightweight one I have tested.
If you prefer an instant solution, you can try Local by Flywheel. It’s an amazing tool but it slows down significantly when you run 2 or more sites at the same time.
Feel free to ask in the comment below if you are stuck in any steps above 🙂