


Composer is a command-line tool to manage 3rd party PHP libraries. But not many people know that it can be used for WordPress plugins and themes.
Follow along this tutorial to learn how:
NOTE: This guide is for Windows using WAMP Server. If you use Mac or another server, the installation part varies a bit.
1. Installation
First, install WAMP Server and Composer:
Check if the Composer has been successfully installed by running the command composer -V.
2. Update PHP Version
Check your PHP version by running the command php -v. If it says 7.0 or above, you can skip this step.
If it’s below 7.0, update the PHP version by following these steps:
- Go to
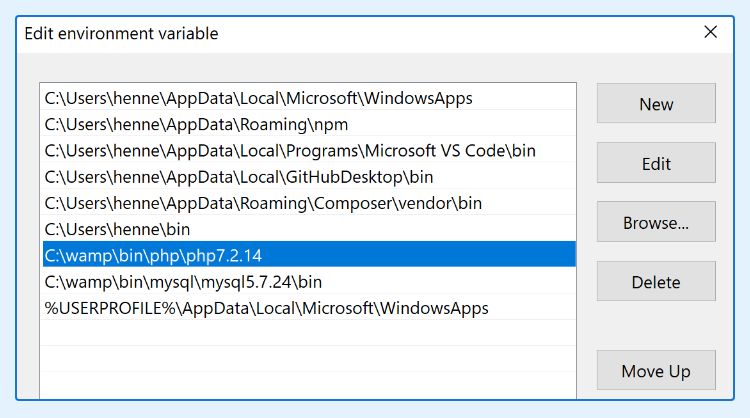
C:\wamp\bin\phpand copy the folder path of the PHP versions that you want. For exampleC:\wamp\bin\php\php7.2.14. - Open Environment variables dialog.
How? Press Windows button > type “env” > click “Edit environment variables for your account” - Double click “Path” under User Variables.
- Replace the path to PHP folder with your new one.
- Done! Check the version again by running
php -v.
3. Create Composer Config File
Create composer.json file in the root directory of your WordPress site. It contains a list of plugins and themes.
Example:
{
  "name": "my/demo",
  "require": {
    "wpackagist-plugin/timber-library": "~1.13.0",
    "wpackagist-plugin/autodescription": "~4.0",
    "wpackagist-plugin/contact-form-7": "~5.1",
    "wpackagist-plugin/w3-total-cache": "*",
    "wpackagist-theme/twentytwenty": "*"
  },
  "repositories": [
    { "type": "composer", "url":"https://wpackagist.org" }
  ],
  "autoload": { "psr-0": { "Acme": "src/" } }
}- You define all plugins and themes inside
require. - The plugin is prefixed with
wpackagist-plugin/followed by its slug. - The slug can be seen in its folder name or in the URL of WordPress.org repo.
Versioning cheatsheet:
* | Get latest version |
1.2.0 | Get version 1.2.0 |
~1.2.0 | The last digit can be updated. For example if there is version 1.2.4, it will download that. But when 1.3.0 is released, it will stay at 1.2.4. |
4. Download the Plugins & Themes
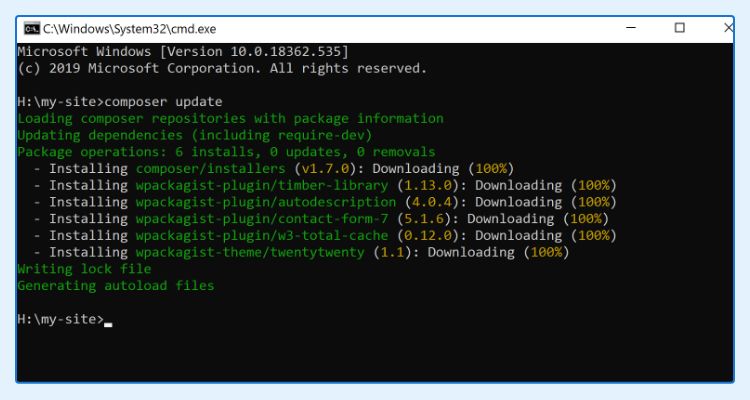
Run this command in the root directory of your site:
composer updateHINT: You can type “cmd” in the File Explorer’s address bar to open command prompt in that directory.
Done! If you want to update the plugins, simply run the same command.
5. Custom Plugins
For plugins that are not in the official repository, there are 2 ways:
- If you are the creator, put it on Github and register it in Packagist with type
wordpress-plugin. - If you are not the creator, zip the plugin (should only contain 1 folder), upload it somewhere, and link it in the config like shown below:
{
  "name": "my/demo",
  "require": {
    "custom/my-plugin",
    ...
  },
  "repositories": [
    { "type": "composer", "url":"https://wpackagist.org" },
    { "type": "package", "package": {
      "name": "custom/my-plugin",
      "version": "1.0.0",
      "type": "wordpress-plugin",
      "dist": {
        "type": "zip",
        "url": "https://yoursite.com/files/my-plugin.zip"
      },
      "require" : { "composer/installers": "~1.0" }
    } }
  ],
  "autoload": { "psr-0": { "Acme": "src/" } }
}
Conclusion
There are many benefits of using Composer:
- Convenient – One command to get everything.
- Synchronize – Making sure your Live and Local site uses the same plugins and versions. (You need SSH access to install Composer in your live server).
- Git Friendly – Commit
composer.jsonand ignorewp-content/plugins.
For more power, you can combine Composer with WP-CLI so you can download the WP core files too.
Let me know in the comment below if you have trouble in the comment below. 🙂


[…] on you. I usually only choose Uploads because I use Composer for the plugins and Github for the […]
[…] How to Use Composer […]